DIY light-painting needles, whips and fiber optic
Here are the instructions to build this DIY acrylic rod / fiber optic connector.
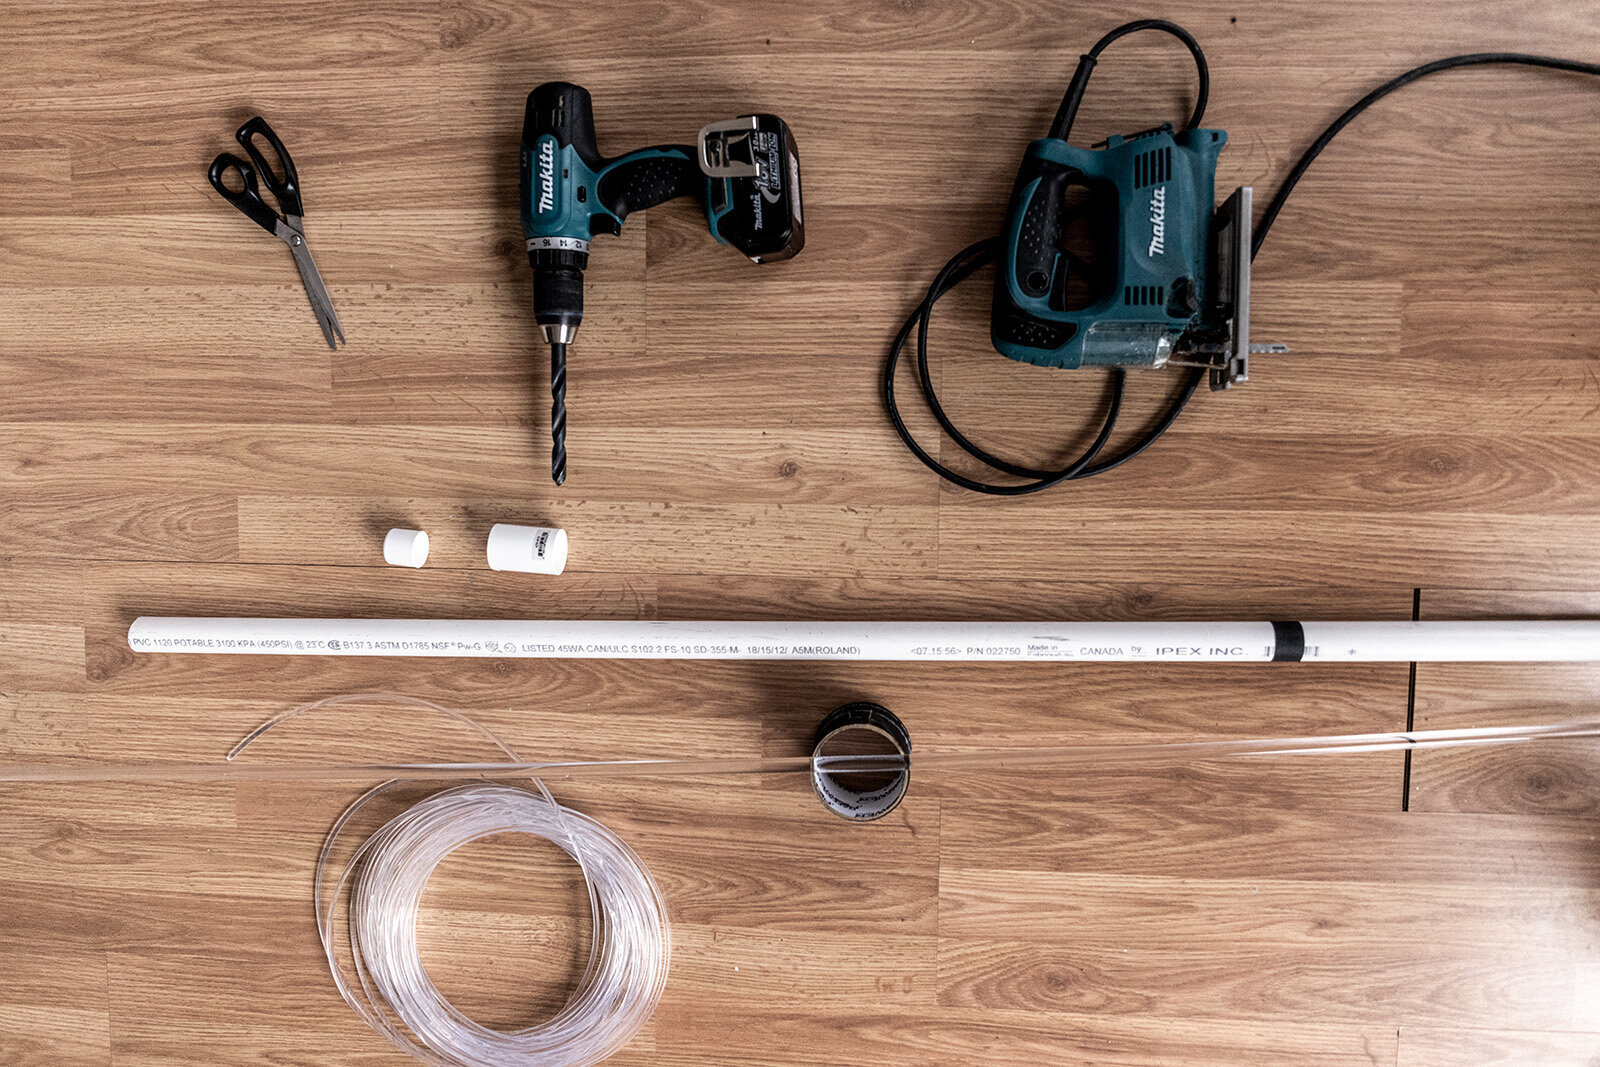
Raw material
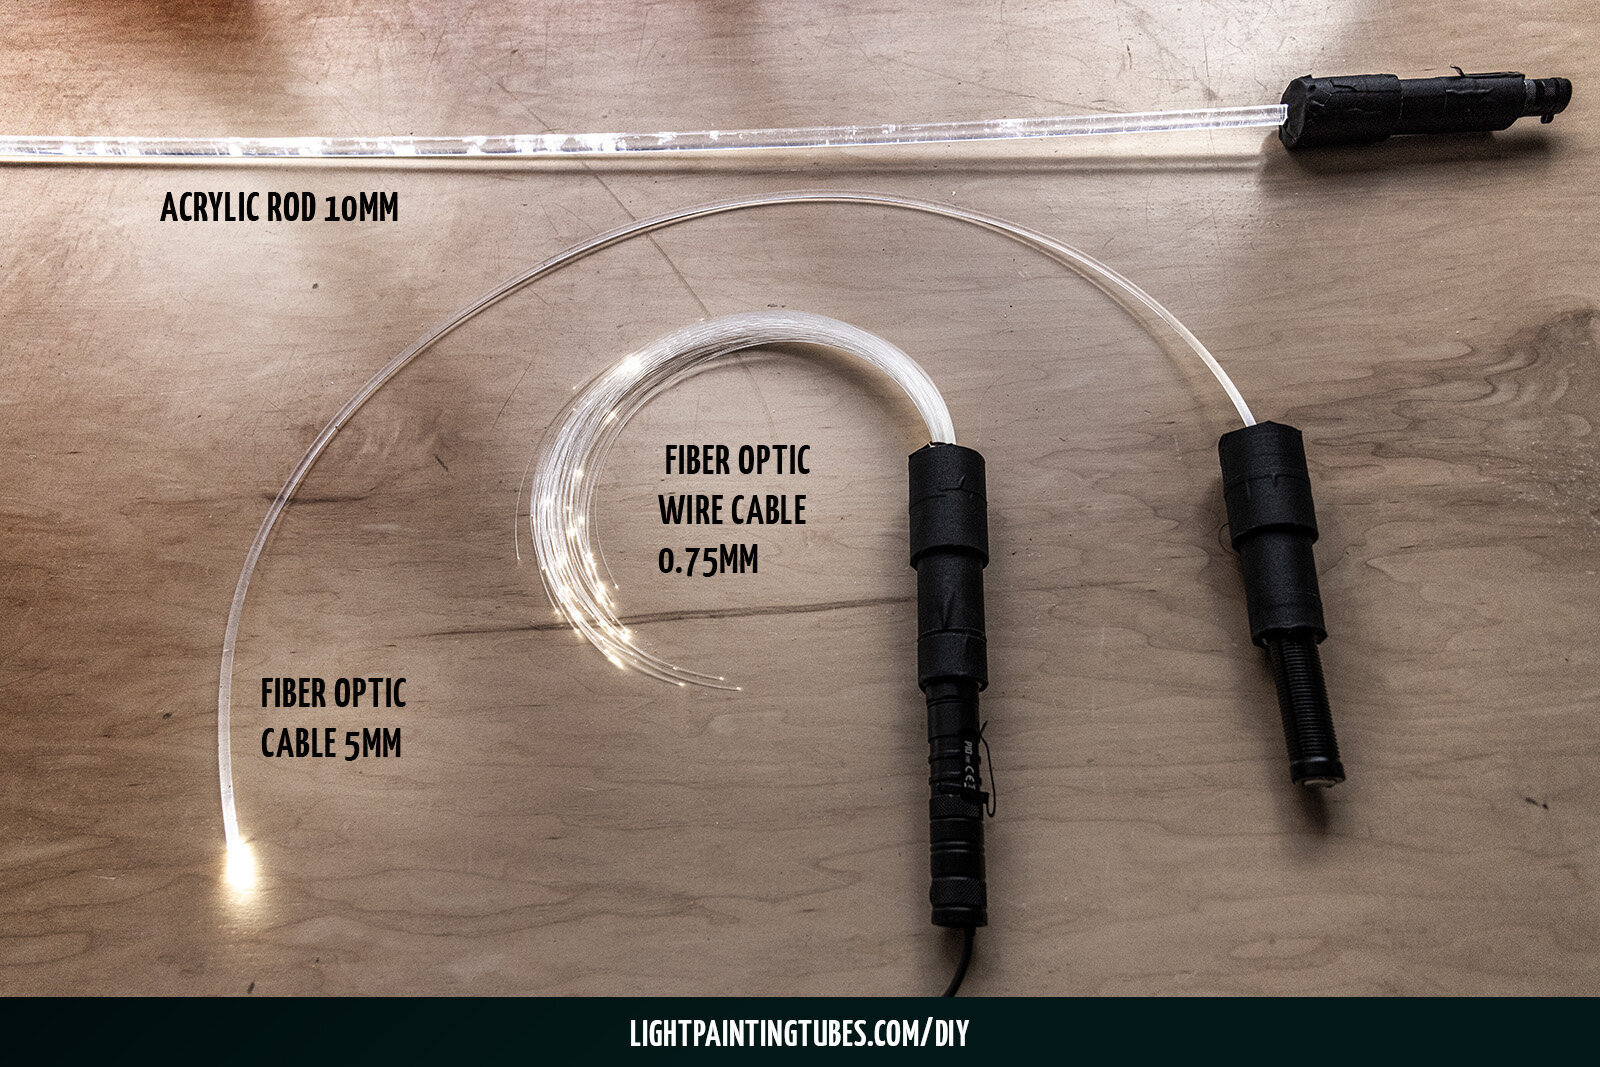
10mm acrylic rod: amzn.to/39807Uz
5mm fiber optic cable: amzn.to/2QvnOjj
0.75mm fiber optic wire cable: amzn.to/317EfnY
Non DIY options from our store
Flex needles: lightpainting.store/products/flex-needlelights
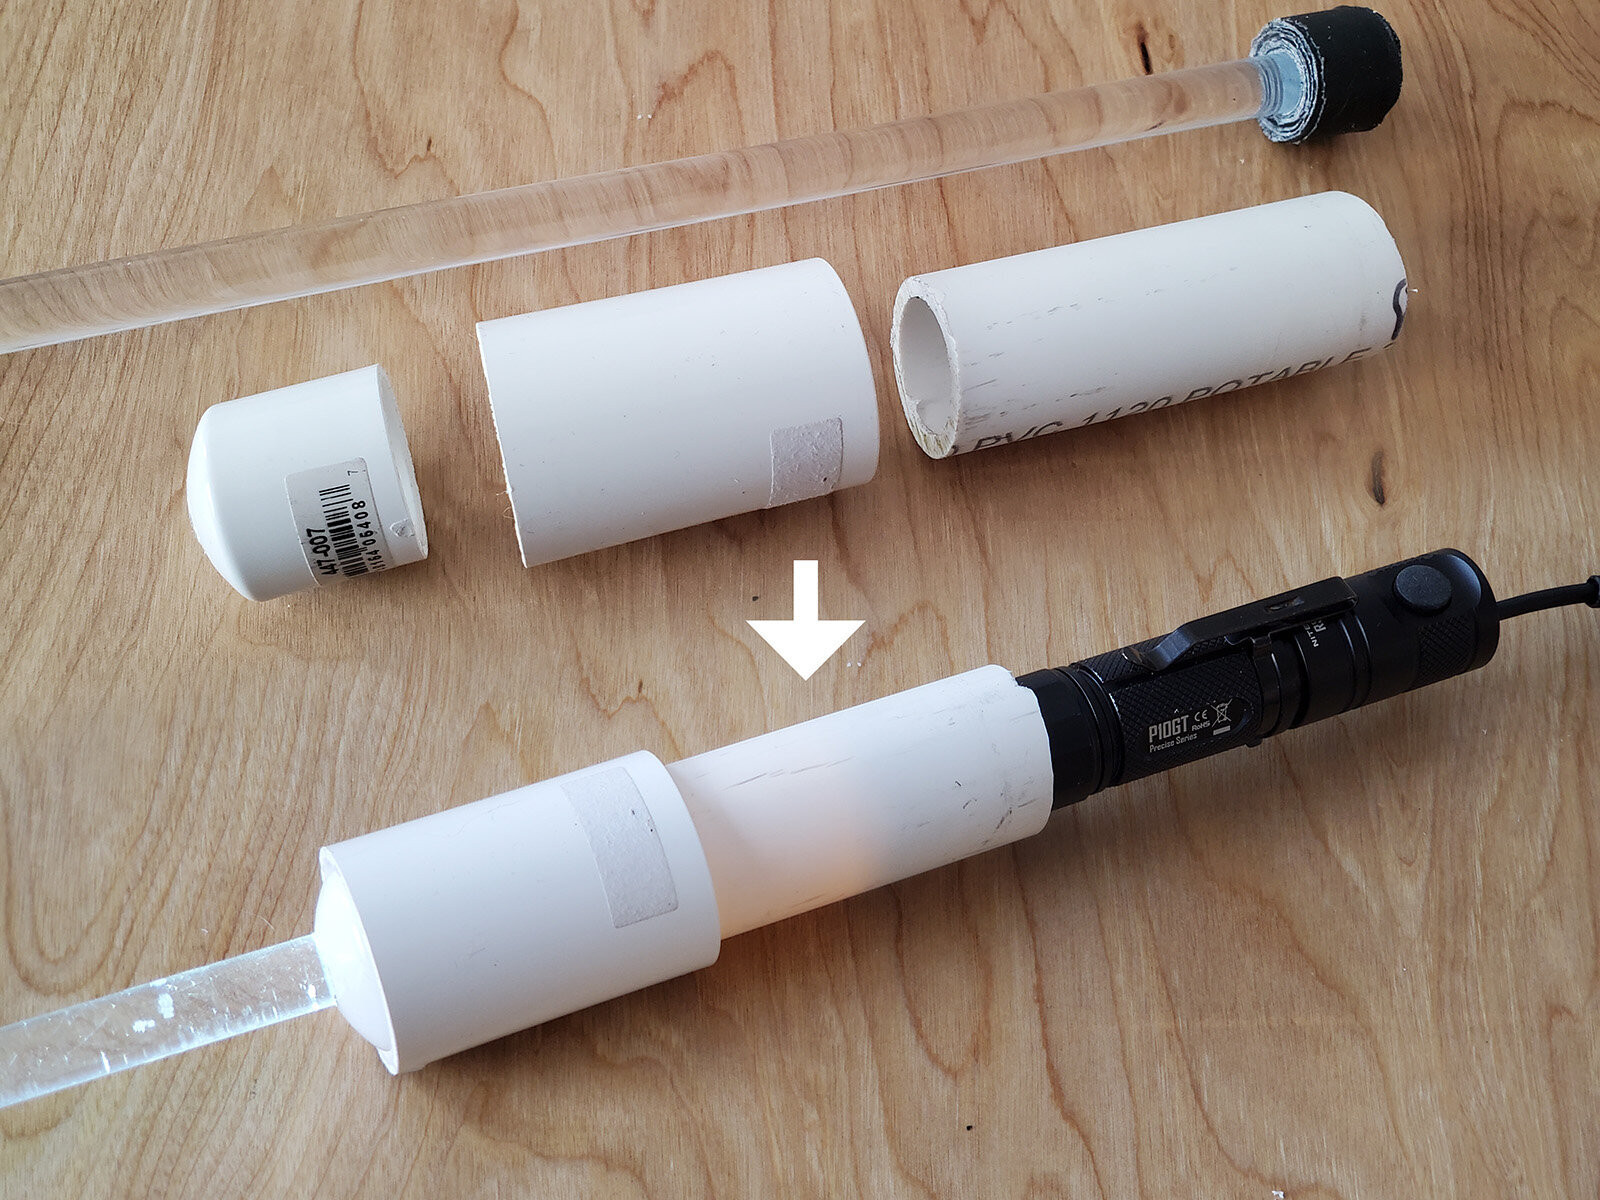
For the connector, you will need;
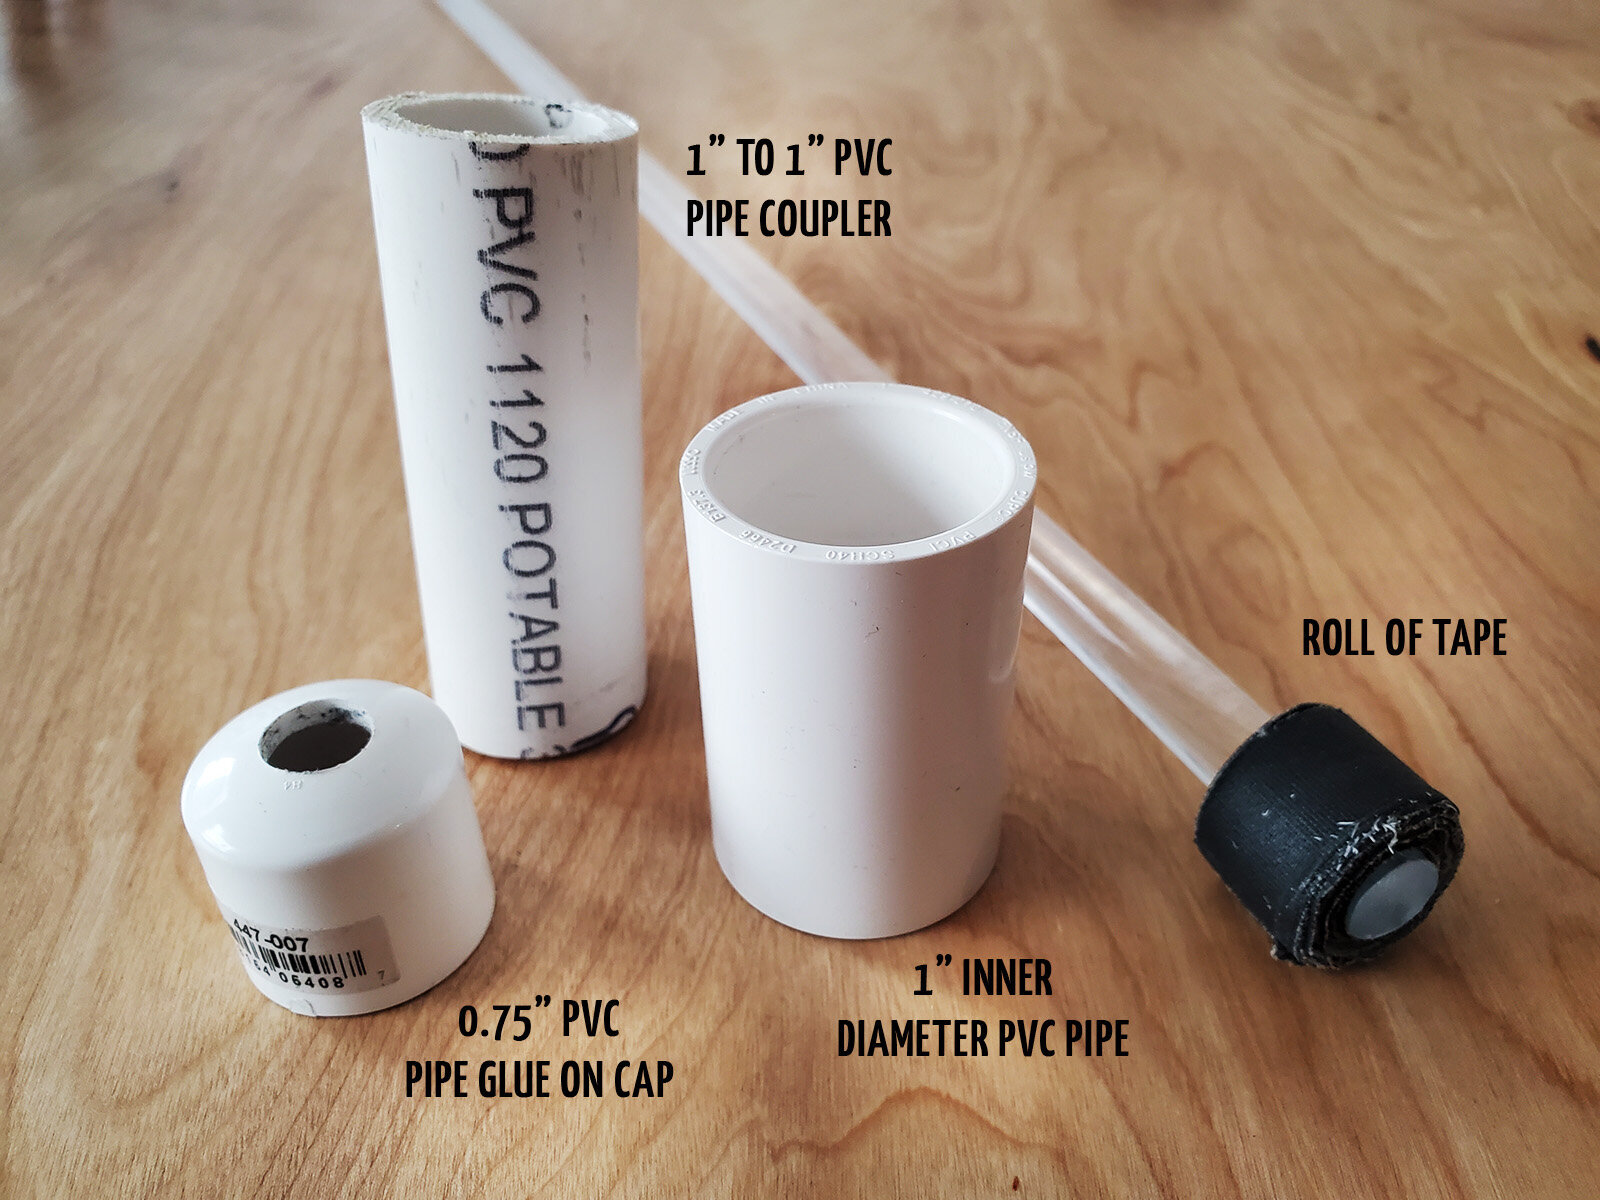
One 1-inch inner diameter PVC pipe
One 1-inch to 1-inch PVC pipe coupler
One ¾ inch PVC pipe glue on cap. (make sure that the outer diameter of the bottom of the cap is 1 inch)
One roll of black tape. (we used black gaffers’ tape in the demo, but duct tape will do)
Here are some suggested tools to do the work:
A drill
A ½ inch drill bit
Any type of saw suitable for pipe cutting.
Here are the steps
Cut a 3-inch length of pipe.
Put the cap upside down inside the coupler. This will allow you to drill a ½ inch hole in the center of the cap without the drill bit drifting side to side. Then flip the cap and press-fit it right side up in one end of the coupler.
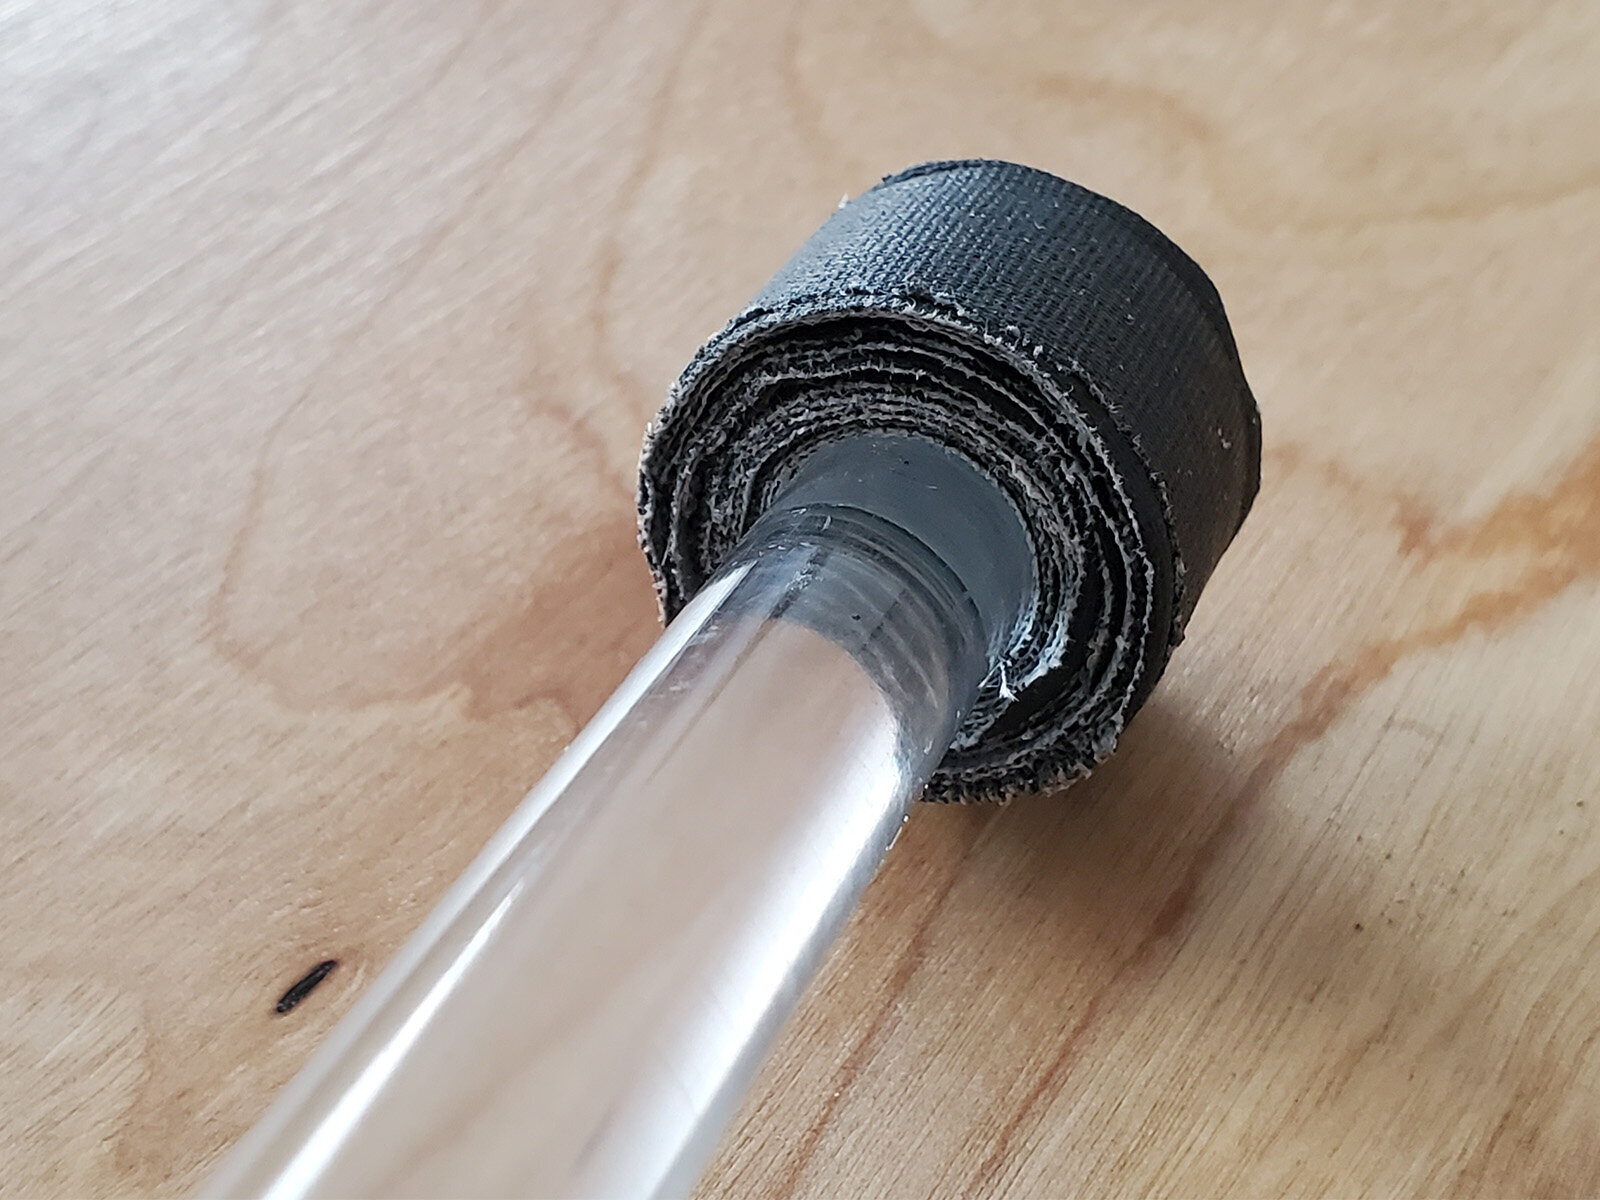
Slide the tool through the hole you made and make a tape puck big enough to fill the inside of the cap.
Fit your 3-inch long pipe inside the other end of the coupler.
Cover everything in tape to avoid any light leak.